


I’ve been a wedding invitation designer for a decade now, so here is an outline of the process of designing custom wedding invitations from start to finish!
I will link out to additional resources because I want this to serve as an overview, but we dive deeper into these topics in other posts / videos / tools. For the FULL, 10+ hour breakdown, our class From Start to Suite will teach you every detail of this process.
Some of these links may be affiliate links, for which we receive a small commission if you make a purchase. However, all of these tools are the ones we use every day in our business and pay for directly.

Custom Invitation Timeline
We recommend sending wedding invites about 3 months before your wedding, so it’s important to start the design process early if you want custom invitations. I usually allow 1 month for design and 1 month for production, so for customs we start at least 5 months before the Big Day.
Every custom designer will have different timelines though, and things that can increase it are complexity of design, printing methods, quantity, and assembly time. A lot of designers book earlier than this though, so make sure you’re on the calendar as soon as possible!
Booking Custom Invitations
The booking process for custom invitations usually looks like this:
- Inquiry – fill out the contact form and attach your wedding vision board!
- Preliminary proposal (optional)
- Consultation – narrow down vision and specifics as well as learn about the design process
- More customized proposal for your project
- Sign contract + pay retainer (we do 50% up front to book)
Once a client is booked, we send a questionnaire via Dubsado to get all the information about the wedding – dates, times, names, etc. The first round of proofs is usually ready within 5-7 business days from receipt of the finalized questionnaire.
All of these steps take place for us in Dubsado – it runs our contact form, invoices and proposals, takes payments, sends contracts, and also houses the questionnaire forms! I love that everything is in one place, and some of these steps are automated for me.
Designing Custom Wedding Invites
Once the information is in, and everything is booked, it’s time for design! The consultation and design board really help in this piece. Sometimes there is a sketching phase here, especially for extremely custom artwork. I don’t typically do sketches as I prefer to dive directly into design and play from there.

I design all my invitations in Adobe Illustrator, with help from Photoshop and InDesign as well, and occasionally from Procreate if I am drawing something on my iPad. The designs are fully custom, meaning they combine elements that we create from scratch (venue drawings, pet portraits, etc.), elements that we have found or purchased, fonts that we have made and/or purchased, and any other type of artwork necessary. Sometimes we commission custom art, work with art the client has provided, or edit and re-use public domain art pieces.
The first thing I do when designing custom invites is choose material colors. This is because envelopes, ribbons, wax seals, etc. don’t always come in every color you want them to. We have a lot more freedom of color in the prints. If there is a color that’s hard to find in materials, then I know I need to bring that color in via the printed elements.
I copy and paste all the information for the suites into the design files from the Dubsado form – this way I don’t misspell anything accidentally. I also have a Blank Invitation Suite template set up that has all the most common sizes we use for each piece laid out, and placeholder text on each page to make sure I don’t miss anything.
Creating Wedding Invitation Proofs + Mock-Ups
After the Illustrator files are ready to go for the first round of proofs, I will create the Proof in Dubsado with a few main elements:
- The mock-up that shows ALL the pieces together
- Individual photos of each piece of the suite
- Information about each piece (size, paper, print method, etc.)
- Question boxes for feedback
- A reminder about the Address List template that’s due with final print approval
- A signature field for signoffs
Here’s a video showing what our wedding invitation proofs look like in Dubsado!
Wedding Stationery Mock-Ups
We make our mock-ups fully custom in Adobe Photoshop. This part of the process is simple and makes a huge difference. It’s much easier for the client to get the full “vibe” of the invitation suite design when they first open their proof if there is a mock-up in place.
It shows how the colors, sizes, shapes, and materials will all interact. I like to show how the pieces will come out of the envelope too, so they know what to expect there (the “stack” is such an important design element!).
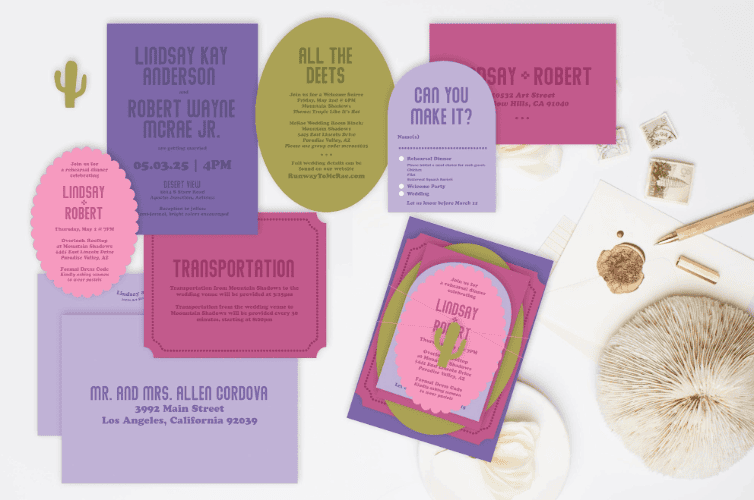

Making these in Adobe Photoshop means that once I create the mock-up, if I make revisions to the initial design files in Illustrator, they will update automatically. So I don’t have to spend much time on this mock-up after the first round of proofs!
For our full tutorial on creating wedding stationery mock-ups from scratch – visit Stationery School!
Prepping Invitation Files for Print
Typically, for custom invitation designs, we go through 3 or 4 total proofs. My custom contract technically allows for unlimited revisions, but limits to 2 “design overhauls”. In that case, it’s on me if I get the vision wrong the first time, but if I get it wrong a second time, then we might be having a miscommunication! I’ll get on the phone before the 3rd version of the proofs and try to narrow things down more clearly (this doesn’t happen often!).
Once they finalize the proofs and sign off for printing, we have to prep all the files. This is, I’ll admit, my least favorite part of the job. It’s sometimes tedious and you have to be careful to set things up correctly so you don’t have costly reprints!
Typically prepping files for printing involves:
- Outlining all text
- Adding bleeds
- Vectorizing some elements
- Releasing clipping masks
- Adding the correct marks for your printers
- Cleaning up loose marks
- Saving everything as individual PDFs
Our envelope addressing template is due the day they approve their proofs so we also have to set up the envelope files for printing or calligraphy. Here’s how we do that in Adobe InDesign!
Printing Wedding Invitations
Next up is printing! Typically, we order invitations as soon as possible after the order is approved for print. We also order additional supplies like ribbons, wax seals, etc. and provide the client with a timeline for production.
The only things we print in-house are envelopes (sometimes), vellum (sometimes), and handmade paper (usually). Otherwise, we order all prints from our favorite print shops!
Most of our digital and foil printing goes through PrintsWell, our favorite stationery printer. If you haven’t used them before our link gets you $25 off your first order! PrintsWell offers lots of standard invitation cards with a great selection of invitation papers and colorful envelopes. They are only for wholesale printers though – if you are a DIY Couple, then here is an article with more print shops you can try!
Digital printing takes about a week, whereas letterpress, die-cutting, foil stamping, and other more complex methods may take up to 3-4 weeks each!
Wedding Invitation Assembly
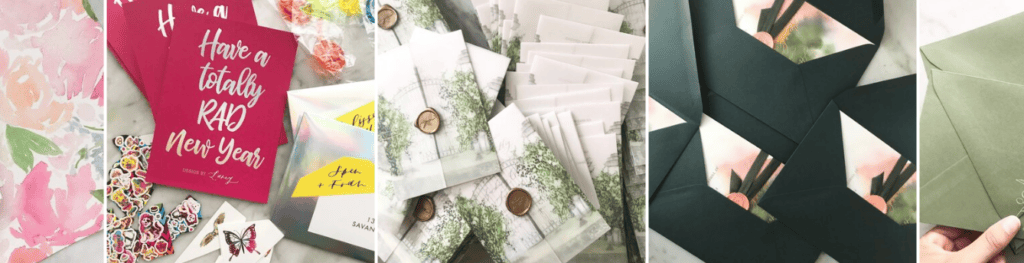
After the prints arrive, it’s time for assembly! This is when everything comes together, and one of my favorite parts. I like to batch assembly to make it a lot faster and prevent mistakes.
Assembling invitations can take 1 day or it can take up to a week, depending on complexity. For custom clients, this involves adding all embellishments (envelope liners, wax seals, ribbons, layers, etc.) and stuffing into the correct envelope. We have to make sure if someone is invited to brunch they get a brunch invite – and if someone isn’t invited to brunch, they do NOT get a brunch invite. There are a lot of logistics involved in making sure the right invitation set goes to the right guest(s).
We also add the RSVP postage onto the RSVP envelopes before assembling everything. We typically do not handle outer postage, but we advise our clients on what the weight *should* be (every Post Office can give different answers, so we always recommend confirming) and we can help them source stamps if they want something special to match the invites. If they want to add on our Stamp, Seal, and Send service they can for a fee!
Once everything is ready to go, we pack it all in a box for easy mailing on their end. We separate out international addresses, their photographer copy, and their extras. We also include some instructions for sealing the envelopes and confirming postage with their local Post Office. Once they are mailed, it can take about 3 weeks for them to arrive to all guests!
Now, the custom wedding invitation process is complete! In just a few weeks, it’s time to start talking about and designing wedding day stationery like menus, table numbers, and place cards. If you are interested in learning more about this process, how to use design programs, printing, and so much more – From Start to Suite is our in-depth, one-of-a-kind foundational class for anyone who wants to start a wedding invitation business!


Behind the scenes with your favorite Stationery Auntie Laney (and all the inside scoops!)


