
If you’re used to outlining your text before printing, you might have found a hiccup in Adobe InDesign – you sadly cannot outline all the text on all the pages at once! While there is a way to do this in Adobe Acrobat (I’ll show it later), it feels a little clunky sometimes. I do this often when printing addresses on envelopes for wedding invitations in my stationery business. These documents are often 100+ pages long, so to outline them individually would be a chore!
So I gently bullied a friend of mine to write us a script that will outline all text on all pages in InDesign! I’ll share how it works and you can find the script here: InDesign Outline All Text Script!
*Some links in this post may be affiliate links, for which I will make a small commission at no cost to you.
Full Affiliate Disclosure*
Outline Text in InDesign – the Easy way!
Using the Outline all Text script from my friend is actually quite easy. This video shows it live!
Once you install the Script, you will see it in your InDesign Scripts Panel, which you can find under Window > Utilities > Scripts.
When you click on the script “OutlineAllTextFrames…” you might be prompted to enter your email to verify your purchase. After that, well, that’s literally all you have to do! You’ll see a success box pop up telling you that all the text frames have been outlined. It works the same whether your document is 1 page or 1,000. You can undo the outlining of the text if you need to for any reason!

One note of caution is that some InDesign formatting will be removed when text is outlined. In these cases, I would outline using Preflight as described at the bottom of this article. This includes things like bullets, numbering, etc. but as far as I have tested, strokes added to text will be preserved with this script.
Why Outline Text before Printing?
In case you’re curious – why do you even need to outline your text for printing? Outlining text will “set” the text where it is. It turns the text from an editable text box into an established vector. Your text will no longer be editable in your document, though. I like to save a new version of my file that’s “Print Ready” before outlining my text so that I can always return to the original file to edit if I need to.
Outlining text almost always leads to better print results. If a printer opens up your file and doesn’t have the same fonts you used, if your text is outlined it will stay the same. If your text is not outlined, sometimes you can get errors if there is a font missing! So not only is it a requirement from almost all printers, it guarantees that your text prints how you want it to.
Outlining Text in Adobe Illustrator
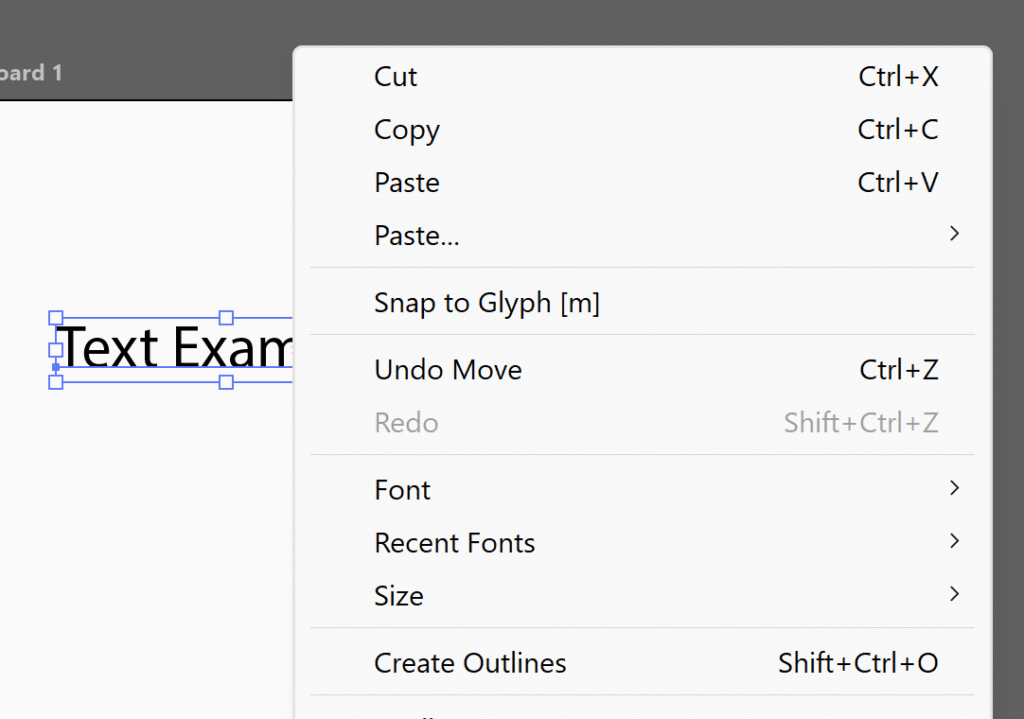
In Adobe Illustrator, it is easy to outline text. You simply select the text you want to outline, right click, and click “Create Outlines”. The shortcut for this is CMD / CTRL + SHIFT + O.
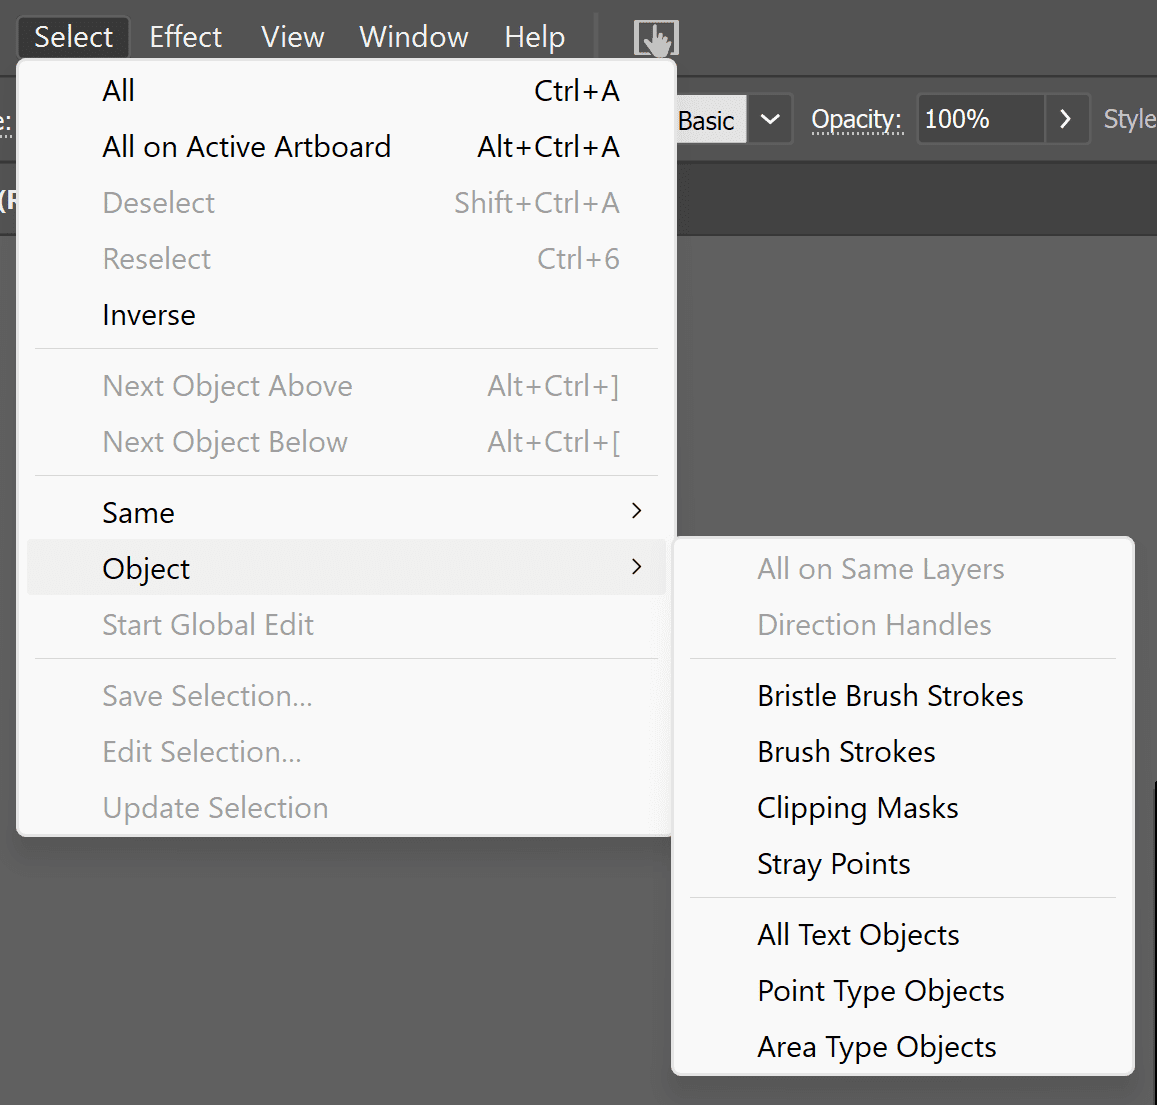
If you want to select ALL text on all artboards, simply go to the Select menu > Object > All text objects. Then you can use Create Outlines and all of your text will be outlined.
Outlining Text in Adobe InDesign
In InDesign, to outline a single text box, you select it and then go to Type > Create Outlines. The keyboard shortcut for outlining text is CMD / CTRL + SHIFT + O.
If you want to select all text on a page, you can select all the text boxes on that page, but you cannot select items from different pages at the same time. The best built-in way to convert all text to outlines is to use Preflight in Adobe Acrobat.
If you don’t want to leave InDesign, then you can grab this Script that will outline all the text for you in InDesign with just a few clicks!
Outlining Text with Preflight in Adobe Acrobat

When you export a document as a PDF from InDesign, you can then open that PDF in Adobe Acrobat. If you have the full Adobe Creative Cloud, Acrobat will be included. Then, you’ll visit All Tools > Use Print Production. If you don’t see Use Print Production, you may need to click “View More” at the bottom of the list.
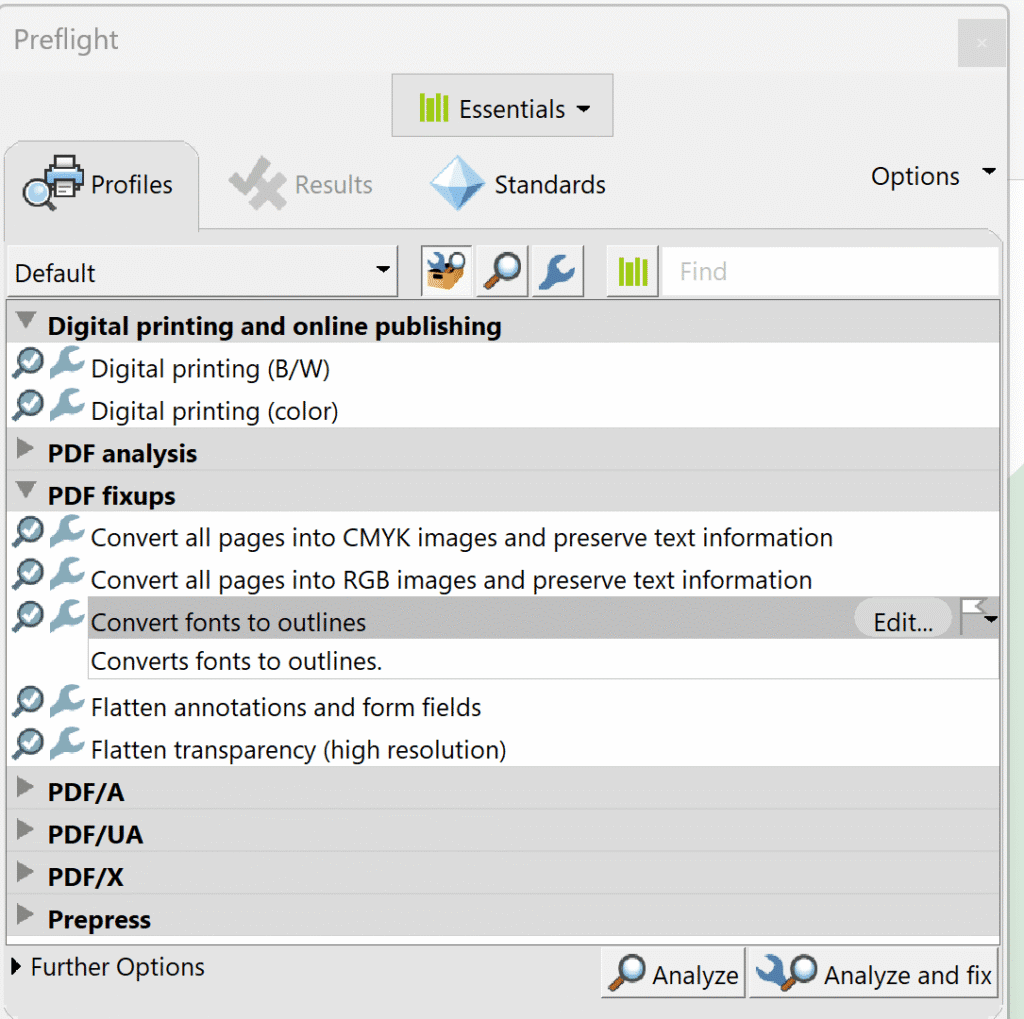
Then, click on “Preflight” and in that panel, under “PDF Fixups” you’ll see “Convert fonts to outlines”. When you click that, you’ll be prompted to save the file. If you are comfortable with the file being outlined, you can just save it with the same name. If not, save it with “Name – Outlined”. The new file will have all fonts outlined on all pages.
While this is a free way to outline all the text, it is using a different program, and I personally prefer using the Outline All Text Script as I can see the results in InDesign and make any additional edits I need afterward.


Behind the scenes with your favorite Stationery Auntie Laney (and all the inside scoops!)

